Insulation is installed in walls, ceilings, and floors to prevent heat loss or gain, and it is a vital part of an energy-efficient home. The most common types of insulation used in homes are fiberglass, cellulose, and foam. All three types are available as batts or rolls, and all can be cut to fit snugly around electrical outlets, pipes, and other obstacles.
Installing insulation in your home can seem daunting, but it’s not that difficult. In fact, with the right tools and a little bit of know-how, you can have the job done in no time. Here are a few tips to help you get started:
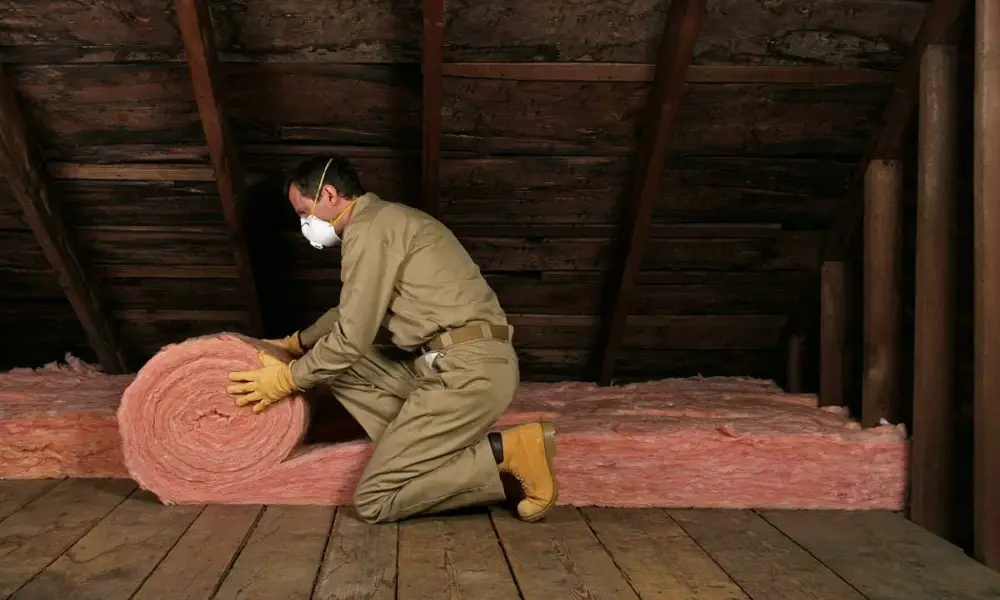
Insulating an Attic With Roll or Batt Insulation
To insulate an attic using roll or batt insulation, follow these procedures.
Step 1: Decide on the materials you’ll use
Determine which insulation material is appropriate for your property before installing it. Insulation batts and rolls come in a variety of shapes and sizes, and fiberglass, cellulose, and rock wool are the most prevalent materials:
The most popular material is probably fiberglass. It’s cost-effective, and newer products aren’t irritating the skin or lungs. Fiberglass insulation is designed to delay the flow of air through it.
Cellulose is a fire-resistant material created from recycled paper. To prevent airflow, the material is packed closely together.
Rock wool (also known as mineral or slag wool) is insulation made by spinning or pulling fibers from molten minerals.
Step 2: Decide on the type of insulation you want
Determine the sort of attic insulation you’ll need:
Insulation in the form of batts and rolls (also known as blanket insulation) is designed to fit between joists and wall stud cavities. They function well in open places like attic floors and are commonly utilized for DIY projects. For our job, we used batt insulation.
Loose-fill insulation (also known as blown-in insulation) is ideal for filling in cracks and gaps in existing insulation. When working with this material, you’ll need a machine, which you can usually rent.
Step 3: Calculate the R-Value
Determine the R-value that is required. The resistance to heat flow of each form of insulation is measured in R-value. The R-value indicates how resistant a substance is. Your climate determines the R-value you’ll require in your home. In colder climates, a greater R-value (between 49 and 60) is required to prevent heat loss during the winter.
Because batt insulation with an R-value of 49 to 60 isn’t available, you’ll have to utilize two layers to achieve a total R-value of 60. Take the total required R-value for your location and deduct the R-value to get the R-value needed for your top layer. Your attic currently has a layer of insulation with an R-value of 21 between the joists and the total recommended R-value for your region is 49.
Formula for calculating R-value: Total R-value that is recommended – Needed R-value = Existing R-value
For instance, 49 minus 21 equals 29. (the R-value needed for the top layer)
Step 4: Work out how much you’ll need
Two insulation layers must be installed for air to travel freely in your attic; wood joists must be covered. The first layer will sit between the joists, while the second will run perpendicular to them. The initial layer should have the facing against the drywall to operate as a vapor barrier. (When it comes to insulation, the basic guideline is that the facing should always face the conditioned space.) So that moisture does not collect between the layers.
Calculate the amount of insulation you’ll need by calculating the length of the attic by the width or use our Roll Insulation Calculator. When buying insulation, remember that rolls are best for long, uninterrupted lines, and small spaces are best served by batts.
Step 5: Set Up Your Workspace
Remove any existing insulation in poor condition that has been squeezed or has mold on it and replace it. If you have a mold problem, get it taken care of before putting in the insulation. Call a professional if you notice evidence of roof damage.
Step 6: Inspect Pipes and Vents
Water pipes can be found in the attic of some homes. In a cold attic environment, hot water running through a pipe can generate condensation on the pipe, which drips onto the insulation or attic structure. Wrap the plumbing with foam pipe wraps to fix this and prevent moisture concerns. They slide over the pipes, and a utility knife may be used to cut them to length.
Ensure that all bath fans are vented to the outdoors. Allowing a bath fan to vent into an attic will result in moisture issues. Some experts advise using HVAC insulation or flexible insulated ducts to insulate vent ducts.
Step 7: Fill in the Cracks
Seal air gaps around utilities and fixtures to avoid heat loss. Spray foam can fill wide gaps around pipelines or light fixtures. Caulk around small places, such as electrical boxes and other utilities, with caulk.
Step 8: Caulk the Flue
To avoid a fire hazard, place barriers around heater flues. Apply a bead of high-temperature caulk around the flue, then press two sheet metal sheets into the caulk to completely encircle it. Attach them to the joists with staples.
Step 9: Examine the Lighting
Check any recessed lights for a Type-IC rating, which indicates suitable for insulation contact. The label may be hidden inside the housing. If the lights aren’t Type-IC certified, keep the insulation away from the fixture to avoid a fire hazard.
Create a 3-inch gap around the fixture by building a box with drywall and screws if necessary. The drywall facing should be installed on the inner side of the box. Then, spray foam along the seams and where the box meets the ceiling.
Step 10: Insulate the skylights
Skylight tunnels should be insulated. Heat can escape via drywall shafts. Skylight tunnels can be insulated in a variety of ways. One option is to fill the gaps between the studs with faced batts and then wrap the entire passage with unfaced insulation. Staples can be used to secure the unfaced insulation to the framing.
Wrap the entire corridor in house wrap and seal the seams with house wrap tape after fastening the insulation. The house wrap holds the insulation in place, which also restricts airflow.
Step 11: Examine the Airflow
Examine your attic’s airflow. Even if you wish to keep heat from escaping through your attic floor, air must flow to keep moisture from accumulating. Air enters the attic through soffit vents on the floor, travels up to the ridge vent, and then departs through the attic. Install rafter vents at the soffits to allow for this ventilation. Slide them along the roof’s underside to the soffit and staple them. The insulation batts will be placed against the vents.
Step 12: Draw a Utilities Map
Before you start insulating, make a list of all the utilities you’ll need. On the rafters above, you can also mark electrical routes and fixtures.
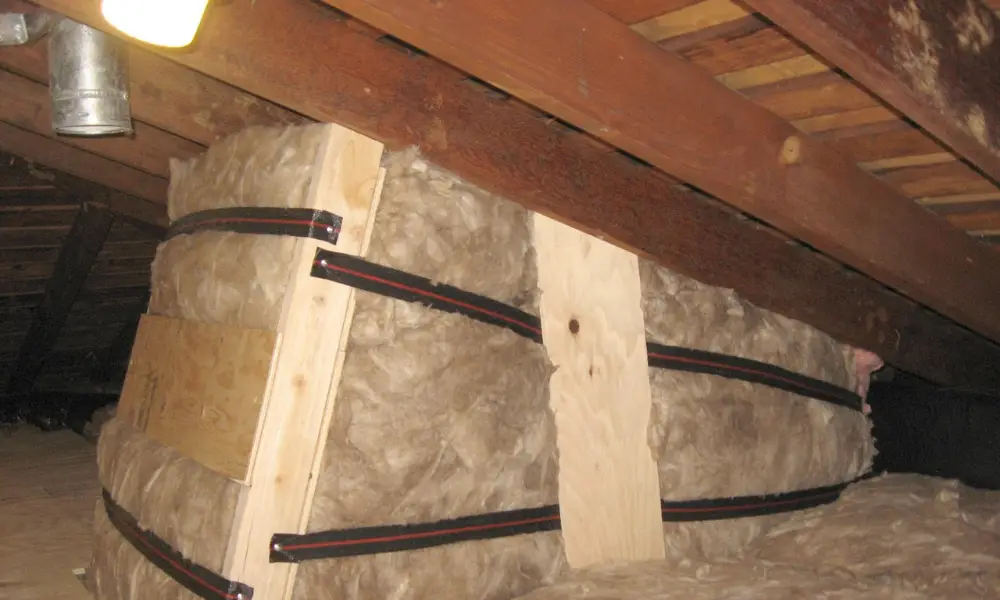
Step 13: Build a Storage Deck
If you want to store things in your attic, you’ll need to build a storage deck (if not, skip to Step 14). Because there will be two insulation levels, the deck must be higher than the second layer’s height. Build a structure of 2-foot-by-6-foot planks that run perpendicular to the existing joists to form a storage deck. Screws or nails are used to secure everything. The deck can be built to any size you wish.
Install insulation between the joists, then use screws to fasten plywood to the framework’s top.
Step 14: Insulate the joists
You’ll need to build a layer of insulation between the joists if your property doesn’t already have one before adding a layer over the joists. Place the roll insulation between the joists, facing the drywall, in a corner away from the attic hatch. Ensure that it is tucked into the tiny gaps between the rafters and the ceiling joists. Be careful not to compress the rolls as you work; compacted fiberglass loses effectiveness. Cut the rolls as needed with a straight edge and a utility knife.
Step 15: Install the Second Layer
Place the second layer of insulation on top of the first. Tuck small pieces of insulation between the rafters and against the rafter vents to begin. Any current insulation can be left in place if it isn’t damaged. The existing layer should be positioned directly over the joists. If it doesn’t, cover it with a thin piece of insulation. It’s essential to keep in mind that the second insulation layer should be unfaced.
Starting in the opposite direction of the first layer, roll unfaced insulation. Keep the rollers as close together as possible.
Carry on with the installation until you reach the attic hatch. Insulate as near the hatch as practicable, but leave enough landing space for access to the attic via steps or ladder.
Step 16: Insulate the Hatch
A stair hatch can be insulated in a variety of ways. Applying self-adhesive weatherstripping where the door meets the framing is one option.
Apply glue to the back of the hatch and then press a piece of stiff foam against it. If necessary, use cap nails to keep it in place. You may enjoy a cozier and more energy-efficient home now that your attic is adequately insulated.
Adding Insulation to the Rest of Your House
To insulate the rest of your house, follow these instructions.
Stud Wall Insulation
Step 1: Put the Insulation in Place
Tuck the insulation between the studs in a gentle manner. Particular attention should be paid to the corners and edges, and there should be no gaps between the insulation and the cavity.
2nd Step: Remove the Insulation
As needed, cut the insulation to fit. To thoroughly fill the cavity, leave the pieces about 1 inch larger than the cavity.
Step 3: Secure the piece with a staple.
Faced insulation flanges should be stapled to the inner sides of wall studs or stud edges. Avoid overstretching the facing, overcompressing the insulation, or producing gaps or puckers during stapling. Allow friction to hold unfaced insulation when installing it in unfinished walls, such as an interior wall.
Step 4: Fill in the Missing Pieces
Push small pieces of unfaced insulation into gaps around windows and doors using a screwdriver or putty knife. Don’t overfill around window or door frames with insulation or expanding foam to keep them from bowing.
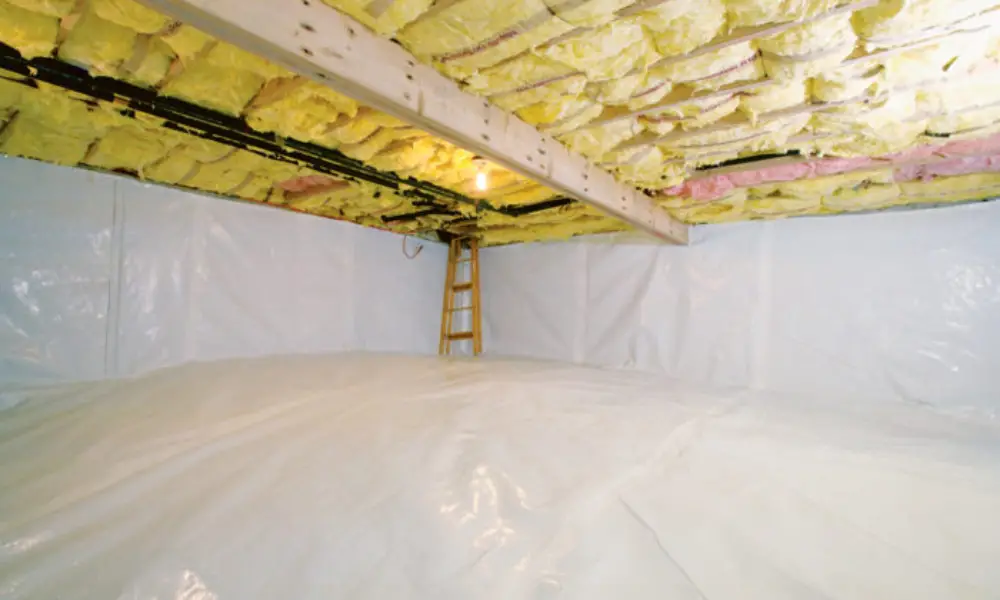
Unconditioned/Vented Crawlspace Insulation
Step 1: Put the Sheeting Up
Cover it with plastic sheeting to prevent ground moisture from entering the crawlspace. The insulation manufacturer’s specifications should determine the required thickness of plastic. Overlap the seams by 12 inches and run the plastic at least 6 inches up the walls. Use tape to attach the plastic to the walls, seal the seams, or use lumber or pebbles to hold them in place.
Step 2: Insulate the Joists in the Header
Small pieces of crawlspace insulation should be cut and installed against the header/band joists (those at the end of the floor joists) above the foundation walls, and they should be able to fit tightly between the floor joists’ ends.
Step 3: Insulate the Floor Joists in the Crawlspace
When insulating floor joists, begin at one end of the crawlspace and work towards the other. If you’re using faced insulation, keep the paper vapor retarder facing up and against the subfloor. The insulation should be tucked in between the joists and against the subfloor. Ensure the insulation you put at the header/band joists is in touch with each run.
Cut the insulation to suit any small places between the floor joists.
Step 4: Put it all together
With wire supports, secure the crawlspace floor insulation against the subfloor. At least 6 inches from each end of the insulation and 12 to 16 inches apart. Without compressing the supports, they should softly bow up against the insulation.
Insulating a Crawlspace That Isn’t Ventilated
Step 1: Put the Sheeting Up
Cover the crawlspace floor with plastic sheeting to keep ground moisture out of the area and away from the under-house insulation. The insulation manufacturer’s specifications should determine the required thickness of plastic. Overlap the seams by 12 inches and run the plastic at least 6 inches up the walls. Tape the plastic to the walls and tape or timber to hold the seams together.
Step 2: Insulate the Joists in the Header
Small pieces of insulation should be cut and installed against the header/band joists (those at the end of the floor joists) above the foundation walls, and they should be able to fit tightly between the floor joists’ ends.
Step 3: Insulate the Floor Joists in the Crawlspace
Cut the insulation to cover the walls at the end of the floor joists. The insulation should reach 2 feet onto the crawlspace floor and dangle from the sill above the wall, butting up against the insulation you installed in Step 2 above.
Step 4: Finish and Secure
Nail the insulation to the sill’s edge, using furring strips to keep it in place.
Cut the insulation to extend 2 feet onto the floor from the top of the stringer joists (the joists that run parallel to the floor joists).
Attach the top end of the insulation to the stringer joists by nailing or stapling it to the subfloor.
Basement Wall Insulation
Step 1: Install the insulation
See Insulating Stud Walls above for a basement with framed walls. Instead of insulation rolls or batts, foam boards can be used.
Install facing insulation in horizontal runs commencing at the sill above the wall in a basement with unframed walls. Place a furring strip over the upper run’s flange. Nail the furring strip and flange into the sill with nails.
Step 2: Install the Second Layer
Overlap the facing flanges as you butt the next row of insulation against the first. Stapling the second layer to the first layer through the flanges will keep them together. You can also use furring strips to run around the walls and staple the insulation flanges to the furring strips.
Step 3: Put it all together and call it a day
Continue to put insulation all the way down to the floor. Cover the seams and stapled edges with 3-inch vinyl repair tape. Cut small pieces of insulation to fit tightly against the header/band joists and install them (those at the end of the floor joists).
Working with Insulation
Wear a disposable coverall or an old long-sleeved shirt and long leggings. Safety equipment such as eye protection, gloves, and dust masks are advised. Knee protectors can come in handy if you’re working in a crawlspace or attic. When working in small places or around exposed roofing nails, a hard hat comes in handy.
Carefully open insulation packages only as needed. When you open the package, the insulation expands fast.
Insulation should not be compressed or doubled over. The R-value of material changes when it is folded and compressed.
When you’ve finished filling a cavity with roll or batt insulation, fluff it to its full expansion by pulling it forward.
Cut the insulation against a safe backstop, such as an unfinished floor or another smooth, flat surface, on the unfaced side. Don’t make any cuts near the wire.
To fit the insulation around obstructions like bracing, ducts, electrical boxes, wiring, and pipes, you may need to split or cut it.
If you reside in a region where frozen pipes are an issue, ensure sure your pipes are adequately insulated.
Ensure your ductwork is insulated when necessary to help your heating and cooling system run more efficiently.


Leave a Reply